


What You’ll Learn
In this lesson, you will learn how to save PowerShell objects as CSV data and load that data again later. You will use an inventory report that an operations team can open, share, and reuse.
- Understand what CSV data is and why it is useful.
- Export PowerShell objects with Export-Csv.
- Import CSV rows as PowerShell objects with Import-Csv.
- Use imported properties to display or create another report.
The Concept
CSV stands for Comma-Separated Values. It is a simple text format in which each line represents a row and commas separate the columns. Spreadsheet programs and many operations tools can read CSV files.
PowerShell works especially well with CSV files because each imported row becomes an object. The first row of the CSV normally supplies the property names, such as ComputerName, OperatingSystem, and LastUser.
Use Export-Csv when you want to save objects to a file:
Export-Csvconverts objects into CSV rows.Import-Csvreads CSV rows and creates PowerShell objects.
This is useful when an operations team needs a report that can be emailed or uploaded, or when a script needs to save data now and process it later.
Remember that CSV stores values and column names, not the original PowerShell object behavior. For example, a date or number imported from a CSV may initially be treated as text.
Basic Example
The following example creates a small system inventory, exports it to a CSV file, imports the file, and displays selected information for the operations team.
$inventory = @(
    [pscustomobject]@{
        ComputerName = "OPS-APP-01"
        OperatingSystem = "Windows Server 2022"
        LastUser = "aisha"
        Status = "Online"
    }
    [pscustomobject]@{
        ComputerName = "OPS-DB-01"
        OperatingSystem = "Windows Server 2019"
        LastUser = "miguel"
        Status = "Online"
    }
    [pscustomobject]@{
        ComputerName = "OPS-WEB-01"
        OperatingSystem = "Windows Server 2022"
        LastUser = "riley"
        Status = "Maintenance"
    }
)

$reportPath = Join-Path -Path $PWD -ChildPath "system-inventory.csv"

$inventory | Export-Csv -Path $reportPath -NoTypeInformation

$sharedInventory = Import-Csv -Path $reportPath

$sharedInventory | ForEach-Object {
    "$($_.ComputerName): $($_.OperatingSystem) - $($_.Status)"
}
Expected Output
The CSV file is created in the current folder. The imported data is then displayed as follows:
OPS-APP-01: Windows Server 2022 - Online
OPS-DB-01: Windows Server 2019 - Online
OPS-WEB-01: Windows Server 2022 - Maintenance
How the Code Works
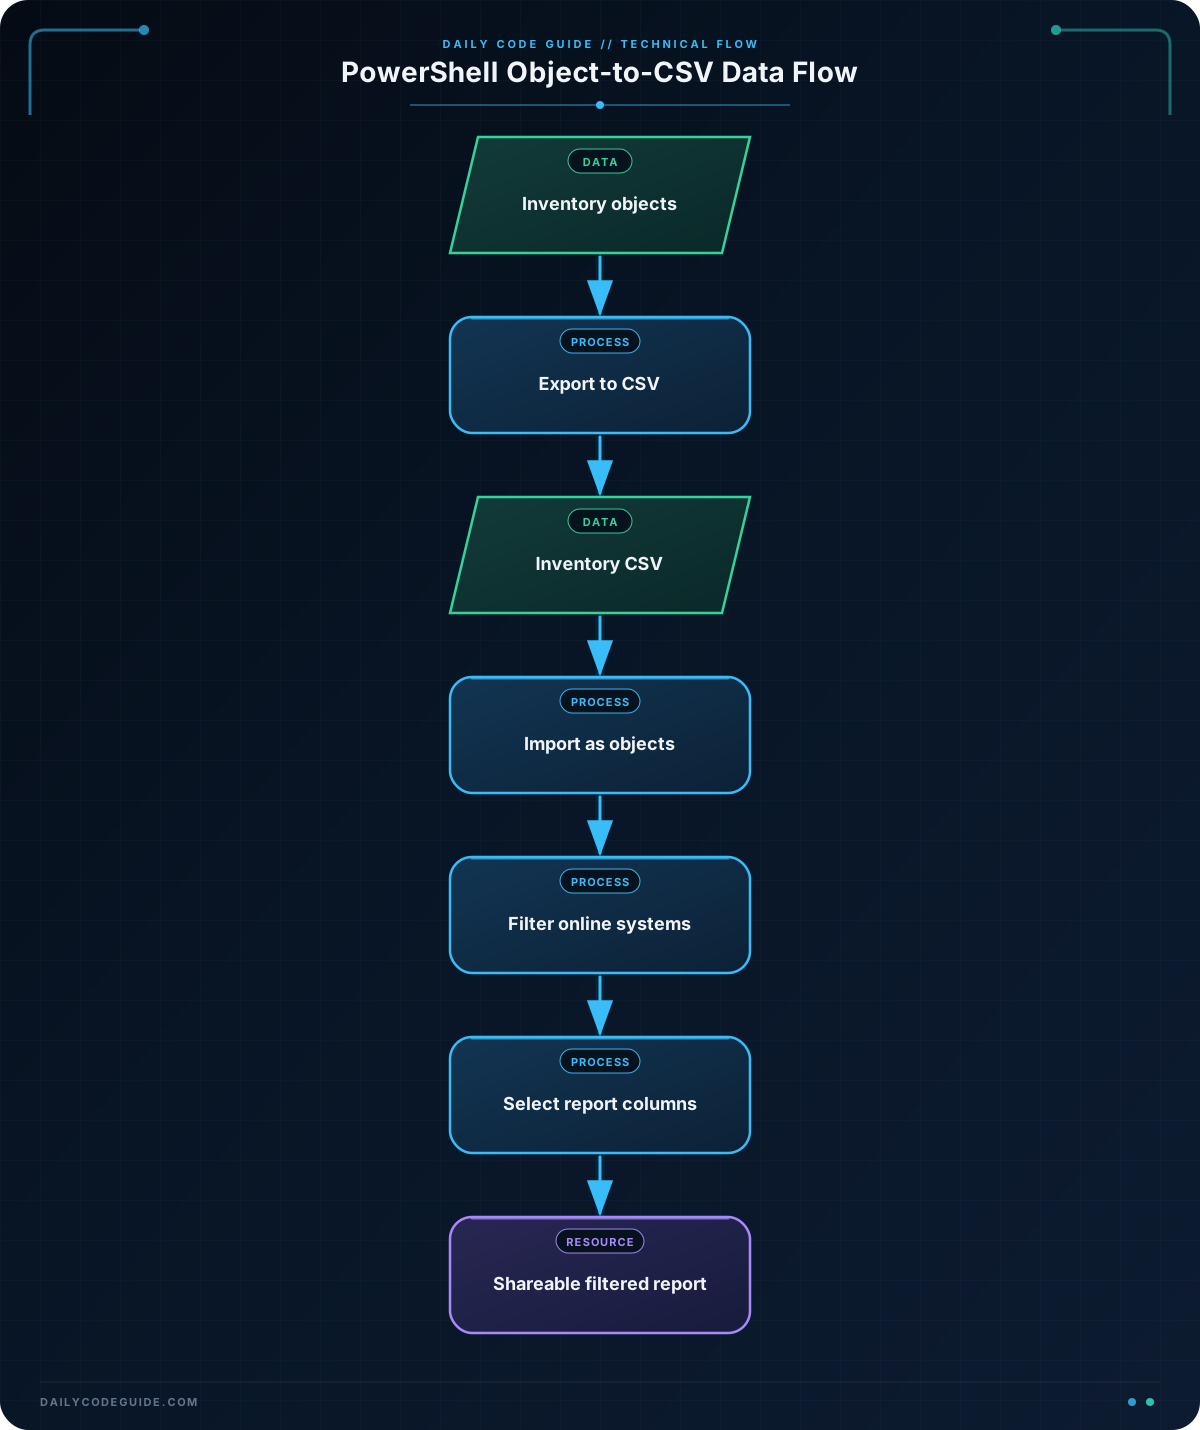
$inventory is an array containing three custom objects. Each object represents one computer. A custom object is useful here because its named properties become CSV column names.
The property names are consistent across all three objects:
ComputerNameidentifies the computer.OperatingSystemidentifies the installed operating system.LastUseridentifies the most recent user.Statusrecords the current state.
Join-Path creates a file path using the current folder stored in $PWD. The result is saved in $reportPath, so the same path can be used for both cmdlets.
This pipeline exports the array:
$inventory | Export-Csv -Path $reportPath -NoTypeInformation
The pipeline sends each object to Export-Csv. The -Path parameter specifies the destination file. The -NoTypeInformation parameter prevents PowerShell from adding an extra type-information line to the CSV. That keeps the file easier for other tools and people to use.
Next, Import-Csv reads the file:
$sharedInventory = Import-Csv -Path $reportPath
The result is stored in $sharedInventory. Each CSV row is now an object whose properties match the column names from the file.
Finally, ForEach-Object processes each imported row. The expression $_.ComputerName means “the ComputerName property of the current object.” The same pattern is used for the other imported properties.
Another Example
After an inventory CSV has been shared, another script can import it and create a smaller report. This example selects only computers that are currently online and exports those rows to a separate file.
$sourcePath = Join-Path -Path $PWD -ChildPath "system-inventory.csv"
$onlinePath = Join-Path -Path $PWD -ChildPath "online-systems.csv"

$onlineSystems = Import-Csv -Path $sourcePath |
    Where-Object { $_.Status -eq "Online" } |
    Select-Object ComputerName, OperatingSystem, LastUser

$onlineSystems | Export-Csv -Path $onlinePath -NoTypeInformation

$onlineSystems
Import-Csv reads the existing inventory. Where-Object keeps only rows whose Status property equals Online. Select-Object chooses the columns needed for the smaller report. The resulting objects are exported to online-systems.csv.
Common Mistakes
- Using
Format-Tablebefore exporting: Formatting commands create display information, not the original data structure. Export the objects directly, then format them only when displaying them. - Forgetting the CSV path: If you use a relative path such as
system-inventory.csv, the file is created in the current folder. UseGet-Locationif you need to check that folder. - Expecting imported values to keep their original types: CSV data is commonly imported as text. If a later calculation requires a number, convert that value explicitly.
- Changing column names accidentally: The property names in the exported objects become the CSV headers. Keep those names consistent when creating inventory objects.
- Overwriting a report unintentionally:
Export-Csvwrites to the specified path. Choose a new path when you need to preserve an older report.
Try It Yourself
Create an inventory with at least three computers and these properties: ComputerName, OperatingSystem, LastUser, and Status.
Export the objects to team-inventory.csv. Then import that file and display only the computer names and operating systems. Include at least one computer with a status of Maintenance.
Challenge
The operations team wants a report containing only systems in maintenance. Create three inventory objects, export the complete inventory to all-systems.csv, and then:
- Import
all-systems.csv. - Select only rows whose status is
Maintenance. - Export those rows to
maintenance-systems.csv. - Display the computer name and last user for each maintenance system.
Solution
$inventory = @(
    [pscustomobject]@{
        ComputerName = "OPS-FILE-01"
        OperatingSystem = "Windows Server 2022"
        LastUser = "jordan"
        Status = "Online"
    }
    [pscustomobject]@{
        ComputerName = "OPS-DB-02"
        OperatingSystem = "Windows Server 2019"
        LastUser = "casey"
        Status = "Maintenance"
    }
    [pscustomobject]@{
        ComputerName = "OPS-API-01"
        OperatingSystem = "Windows Server 2022"
        LastUser = "sam"
        Status = "Maintenance"
    }
)

$allSystemsPath = Join-Path -Path $PWD -ChildPath "all-systems.csv"
$maintenancePath = Join-Path -Path $PWD -ChildPath "maintenance-systems.csv"

$inventory | Export-Csv -Path $allSystemsPath -NoTypeInformation

$maintenanceSystems = Import-Csv -Path $allSystemsPath |
    Where-Object { $_.Status -eq "Maintenance" }

$maintenanceSystems | Export-Csv -Path $maintenancePath -NoTypeInformation

$maintenanceSystems | ForEach-Object {
    "$($_.ComputerName): $($_.LastUser)"
}
The complete inventory is saved first. The second pipeline loads that file, filters the imported objects by their Status property, and saves the matching rows to a separate report. The final pipeline displays the maintenance computer and its last user.
Key Takeaways
- Export-Csv saves PowerShell objects as rows in a CSV file.
- Import-Csv loads CSV rows as objects with accessible properties.
- Object property names become the CSV column headers.
- Export objects directly instead of formatting them before export.
- Imported CSV values may be text, so convert them when later operations require another data type.