


What You’ll Learn
In this lesson, you will learn how to use the tar command in Bash to combine files into an archive, compress that archive, inspect its contents, and extract it safely. The examples use application logs and deployment files, two common system administration tasks.
- Understand what a tar archive is and why compression is useful.
- Create a compressed
.tar.gzarchive. - List archive contents without extracting them.
- Extract files into a chosen directory.
- Avoid common path and overwrite mistakes.
The Concept
tar stands for “tape archive.” It collects multiple files and directories into one archive file. By itself, tar does not necessarily compress the data. The z option tells it to use gzip compression, producing a commonly used .tar.gz file.
Archives are useful when you need to package application logs for transfer, create a backup, or restore deployment files on another server. Instead of copying many individual files, you can transfer one archive.
The most common options are:
-c: create a new archive-x: extract an archive-t: list an archive’s contents-z: use gzip compression-f: specify the archive filename-C: change to a directory before performing the operation
For example, tar -czf logs.tar.gz logs/ means “create a gzip-compressed archive named logs.tar.gz containing the logs/ directory.”
Basic Example
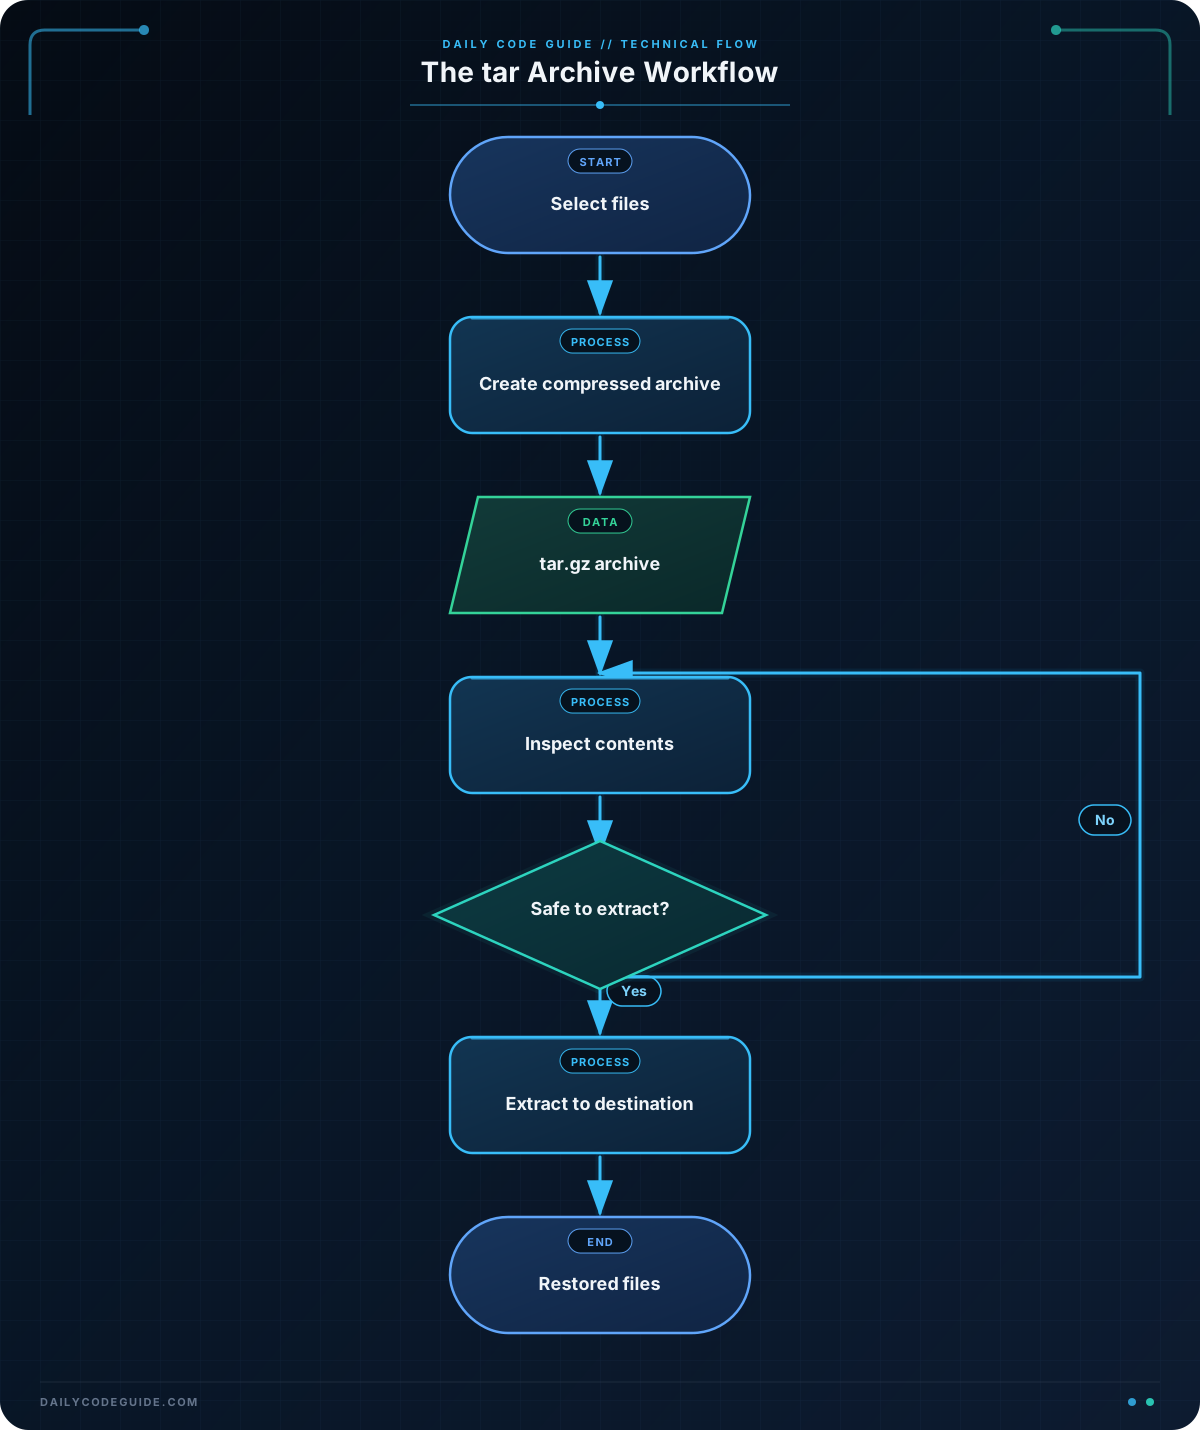
Suppose an application team needs to send its recent logs to a support engineer. The following commands create sample logs, package them into one compressed file, inspect the archive, and restore a copy into a separate directory.
work_dir="log-transfer-demo"
archive="$work_dir/application-logs.tar.gz"
restore_dir="$work_dir/restored"

rm -rf "$work_dir"
mkdir -p "$work_dir/logs"

printf '%s\n' '2026-08-18 10:14:22 INFO API server started' > "$work_dir/logs/api.log"
printf '%s\n' '2026-08-18 10:15:03 WARN Database response took 820 ms' > "$work_dir/logs/database.log"

tar -czf "$archive" "$work_dir/logs"

echo "Archive contents:"
tar -tzf "$archive"

mkdir -p "$restore_dir"
tar -xzf "$archive" -C "$restore_dir"

printf '\nRestored files:\n'
find "$restore_dir" -type f -print
Expected Output
The exact archive listing can vary slightly between tar implementations, but it should show the log directory and both log files. The final listing confirms that the files were extracted below the restore directory.
Archive contents:
log-transfer-demo/logs/
log-transfer-demo/logs/api.log
log-transfer-demo/logs/database.log

Restored files:
log-transfer-demo/restored/log-transfer-demo/logs/api.log
log-transfer-demo/restored/log-transfer-demo/logs/database.log
How the Code Works
work_dir, archive, and restore_dir store paths in variables. Quoting these variables, such as "$archive", protects paths if they contain spaces or other special characters.
The rm -rf command removes the demonstration directory so the example can be run again from a clean state. Be especially careful with rm -rf in real work: always verify the path before running it.
mkdir -p "$work_dir/logs" creates the directory structure. The two printf commands create sample log files. The > operator writes the text to each file.
This command creates the archive:
tar -czf "$archive" "$work_dir/logs"-ccreates an archive.-zapplies gzip compression.-f "$archive"names the output archive."$work_dir/logs"is the directory being packaged.
The -t option lists files without extracting them. This is a useful safety check before restoring an archive:
tar -tzf "$archive"The -x option extracts files. Adding -C "$restore_dir" tells tar to place the extracted directory inside the chosen restore location rather than extracting into the current working directory.
For more background on metadata that may matter during restoration, see our guide to Bash file permissions and ownership. Tar can store file permissions and other metadata, so permissions should be checked when restoring deployment files.
Another Example
Deployment files often need to be moved from a build machine to a server. This example packages a small release directory, lists its contents, and restores it into a new release location. The -C option keeps the archive paths relative to the release directory instead of storing the longer source path.
release_dir="deployment-release"
deployment_archive="deployment-files.tar.gz"
server_copy="server-restore"

rm -rf "$release_dir" "$server_copy" "$deployment_archive"
mkdir -p "$release_dir/config" "$release_dir/public"

printf '%s\n' 'PORT=8080' > "$release_dir/config/app.env"
printf '%s\n' '<h1>Application release</h1>' > "$release_dir/public/index.html"

tar -czf "$deployment_archive" -C "$release_dir" .

echo "Files inside the deployment archive:"
tar -tzf "$deployment_archive"

mkdir -p "$server_copy"
tar -xzf "$deployment_archive" -C "$server_copy"

printf '\nRestored deployment files:\n'
find "$server_copy" -type f -print
Because the archive was created with -C "$release_dir" ., its paths begin with ./ rather than including the local directory name. That makes the archive easier to extract into a deployment directory.
Common Mistakes
- Forgetting
-f: The archive filename should follow-f. For example, usetar -czf backup.tar.gz logs/. - Using the wrong operation: Use
-cto create,-tto inspect, and-xto extract. These operations are not interchangeable. - Extracting into the wrong directory: Use
-C destinationwhen you want to control where files go. - Skipping the inspection step: Run
tar -tzf archive.tar.gzbefore extraction, especially for archives received from another person. - Expecting compression without the right option: A file ending in
.taris usually an uncompressed archive, while.tar.gzuses gzip and requires-zwhen creating or reading it. - Overwriting existing files: Extracting into a directory can replace files with matching names. Use a new temporary restore directory when examining an unfamiliar archive.
Try It Yourself
Create a directory named service-logs with two files: access.log and errors.log. Put one or two realistic log lines in each file. Then:
- Create
service-logs.tar.gz. - List its contents without extracting it.
- Create a directory named
log-review. - Extract the archive into
log-review.
Check the extracted files with find log-review -type f -print.
Challenge
Package deployment logs for transfer using these requirements:
- Create a directory named
release-2026-08-18/logs. - Create
access.loganderrors.loginside it. - Create a gzip-compressed archive named
release-2026-08-18-logs.tar.gz. - List the archive contents before extracting it.
- Extract it into a separate directory named
log-review.
Use variables and quote the paths. The archive should contain the logs directory and its files, but it should not accidentally include an older archive or unrelated files.
Solution
release_dir="release-2026-08-18"
archive="release-2026-08-18-logs.tar.gz"
review_dir="log-review"

rm -rf "$release_dir" "$review_dir" "$archive"
mkdir -p "$release_dir/logs"

printf '%s\n' '2026-08-18 09:00:11 INFO Request completed with status 200' > "$release_dir/logs/access.log"
printf '%s\n' '2026-08-18 09:02:47 ERROR Unable to connect to cache service' > "$release_dir/logs/errors.log"

tar -czf "$archive" "$release_dir/logs"

echo "Archive contents:"
tar -tzf "$archive"

mkdir -p "$review_dir"
tar -xzf "$archive" -C "$review_dir"

printf '\nExtracted files:\n'
find "$review_dir" -type f -print
The solution creates only the intended log directory, so the archive does not include unrelated files. It uses -tzf to inspect the archive before extraction and -xzf ... -C to restore the files under the separate review directory.
If you place these commands in a Bash script and need to troubleshoot the paths being expanded, our guide to debugging Bash scripts with set -x explains how to trace command execution.
Key Takeaways
tar -czf archive.tar.gz filescreates a gzip-compressed archive.tar -tzf archive.tar.gzlists archive contents without extracting them.tar -xzf archive.tar.gz -C directoryextracts files into a chosen directory.- Inspect unfamiliar archives before extraction and avoid extracting directly over important files.
- Quote Bash path variables to handle spaces and special characters safely.